What makes this scene is the volumetric lighting. There is nothing much to it, a basic scene and a simple node setup.
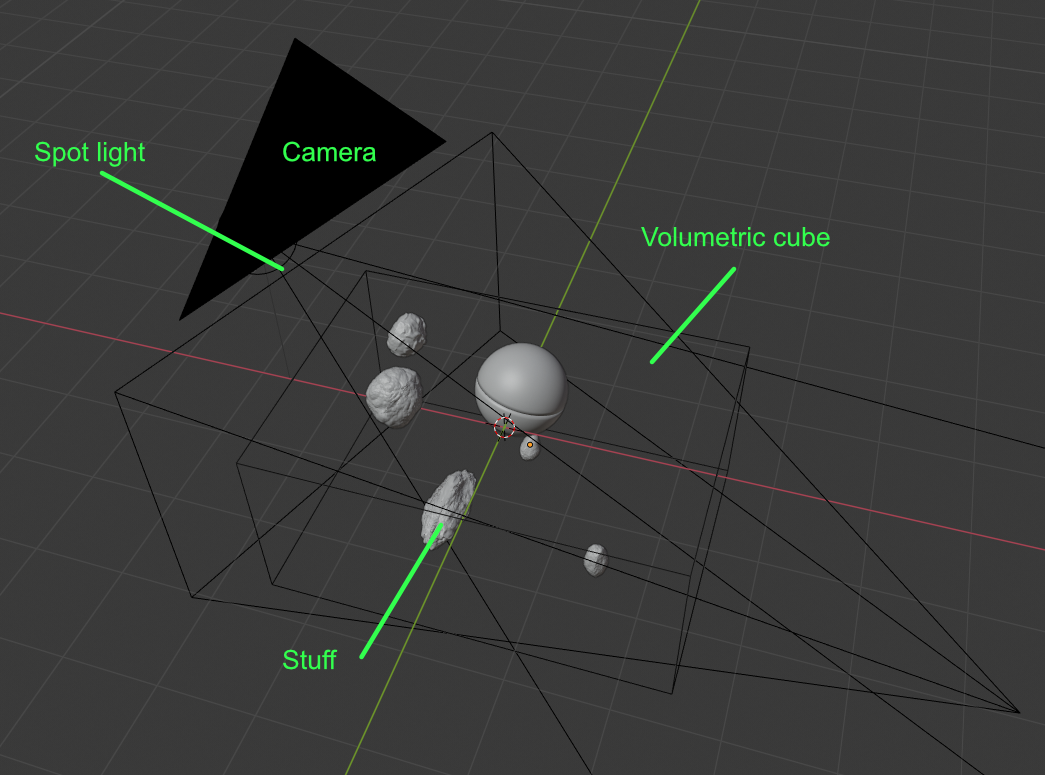
This is the scene:
Keep the face facing the camera relatively far away from the camera sensor plane otherwise things get hyper misty, but if that’s what you are after then move that plane nearer and have some fun with it. Also ensure that the camera frustum fully intersects the cube, otherwise bits of your scene will look weird since they will lack volumetrics.
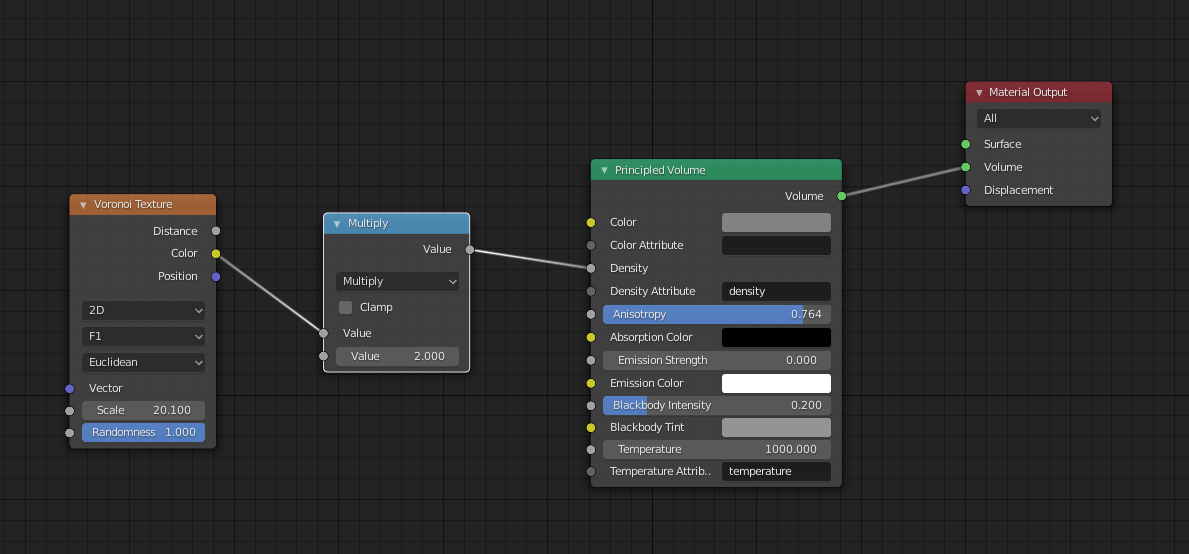
The key to this is the cube for volumetrics; here is the material:
It’s important to set the Voronoi node to 2D, F1 and Euclidean. That’s how the streaks are generated in the volume. The Anistropy does little, but fiddling with the Blackbody value can add some interesting lighting so it’s worth experimenting with, but can be set to zero otherwise.
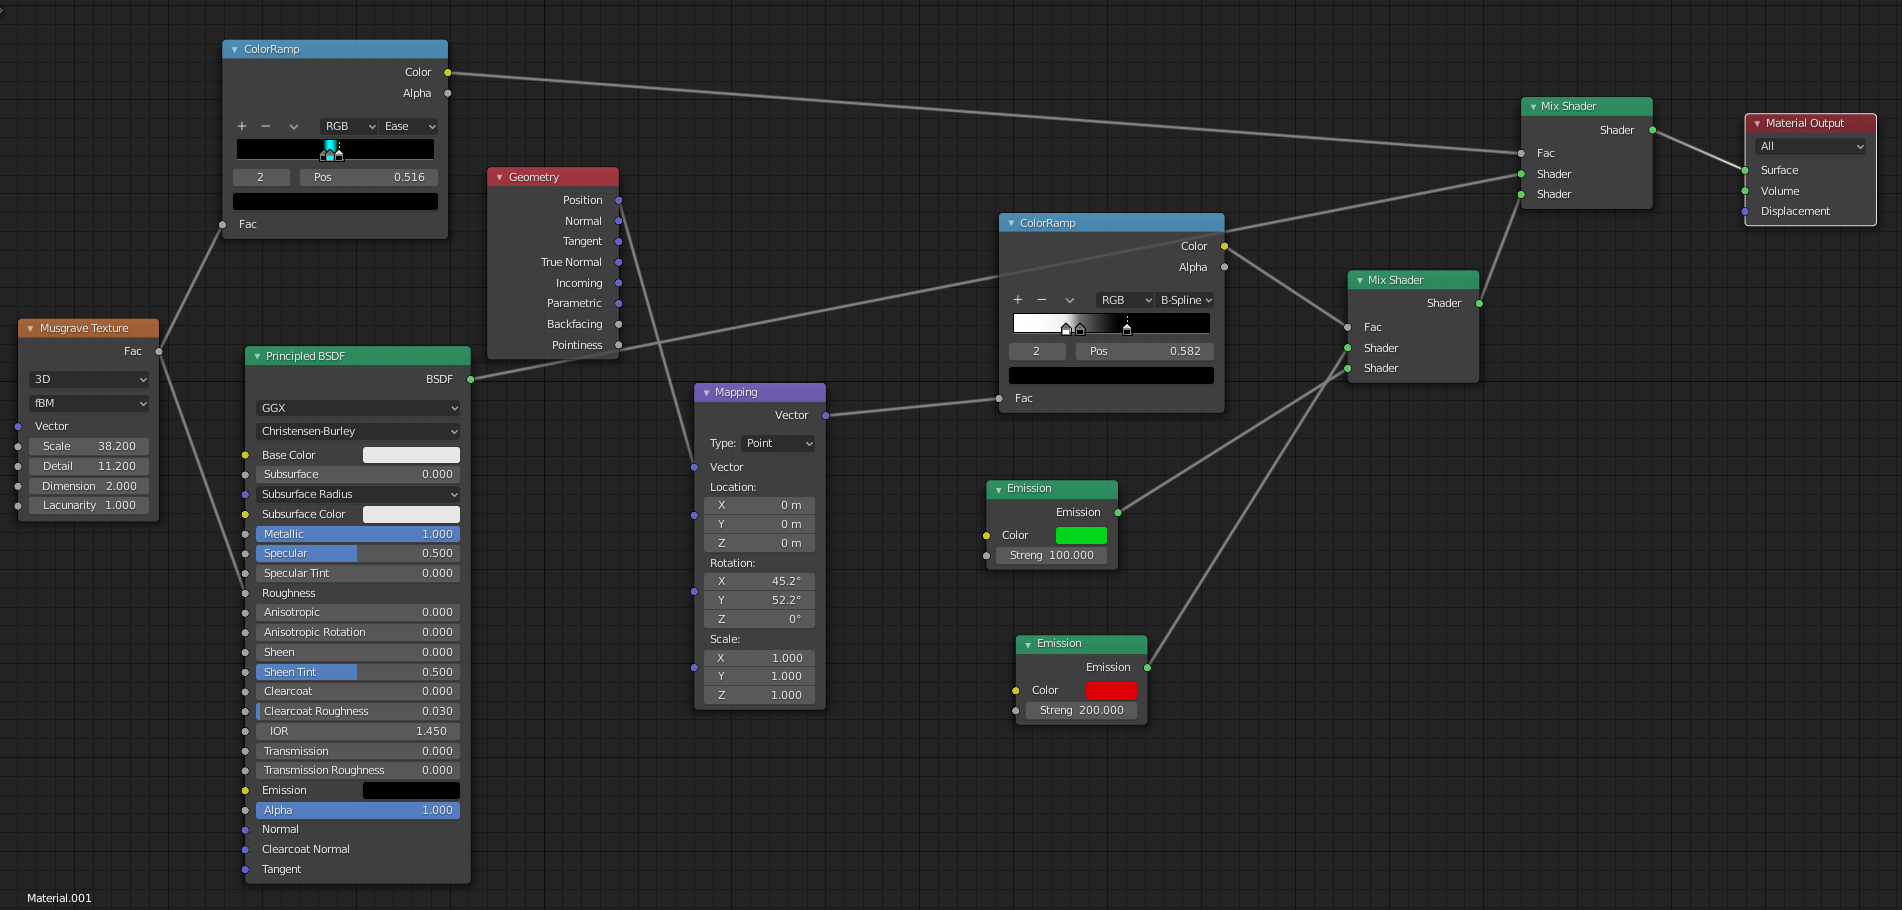
Just in case you were wondering how the alien sphere texture was set up, again it’s really simple.
 The Musgrave node is used both for roughness masking as well as masking the areas to be lit by the glowing stuff.
Tweaking the colour ramp on the left (no idea why the centre stop is blue, it should be white) will control the width of the looping bands. I kept them fairly thin.
The geometry node was used as a shortcut to get the right hand side of the alien artefact red whilst the left is green with some smoothing in between. The mapping is used to rotate this effect into the desired position.
The big issue with volumetrics is noise. There is no easy way to solve that. The new denoiser node makes a hash of this sort of scene for some reason, so the simple if time consuming solution was to render the scene at a far higher resolution and downres it. Works a charm and in this case gave it a sort of oil paint like look.


