Caustics are those interesting highlights caused by light refracting through glass, water or optically similar media. Creating caustics in CGI is not only tricky and time consuming, it also takes a considerable amount of computing power and time to render. Being able to fake this is a useful technique.
I came across a great technique in this video by Polyfjord and simply had to have a go.
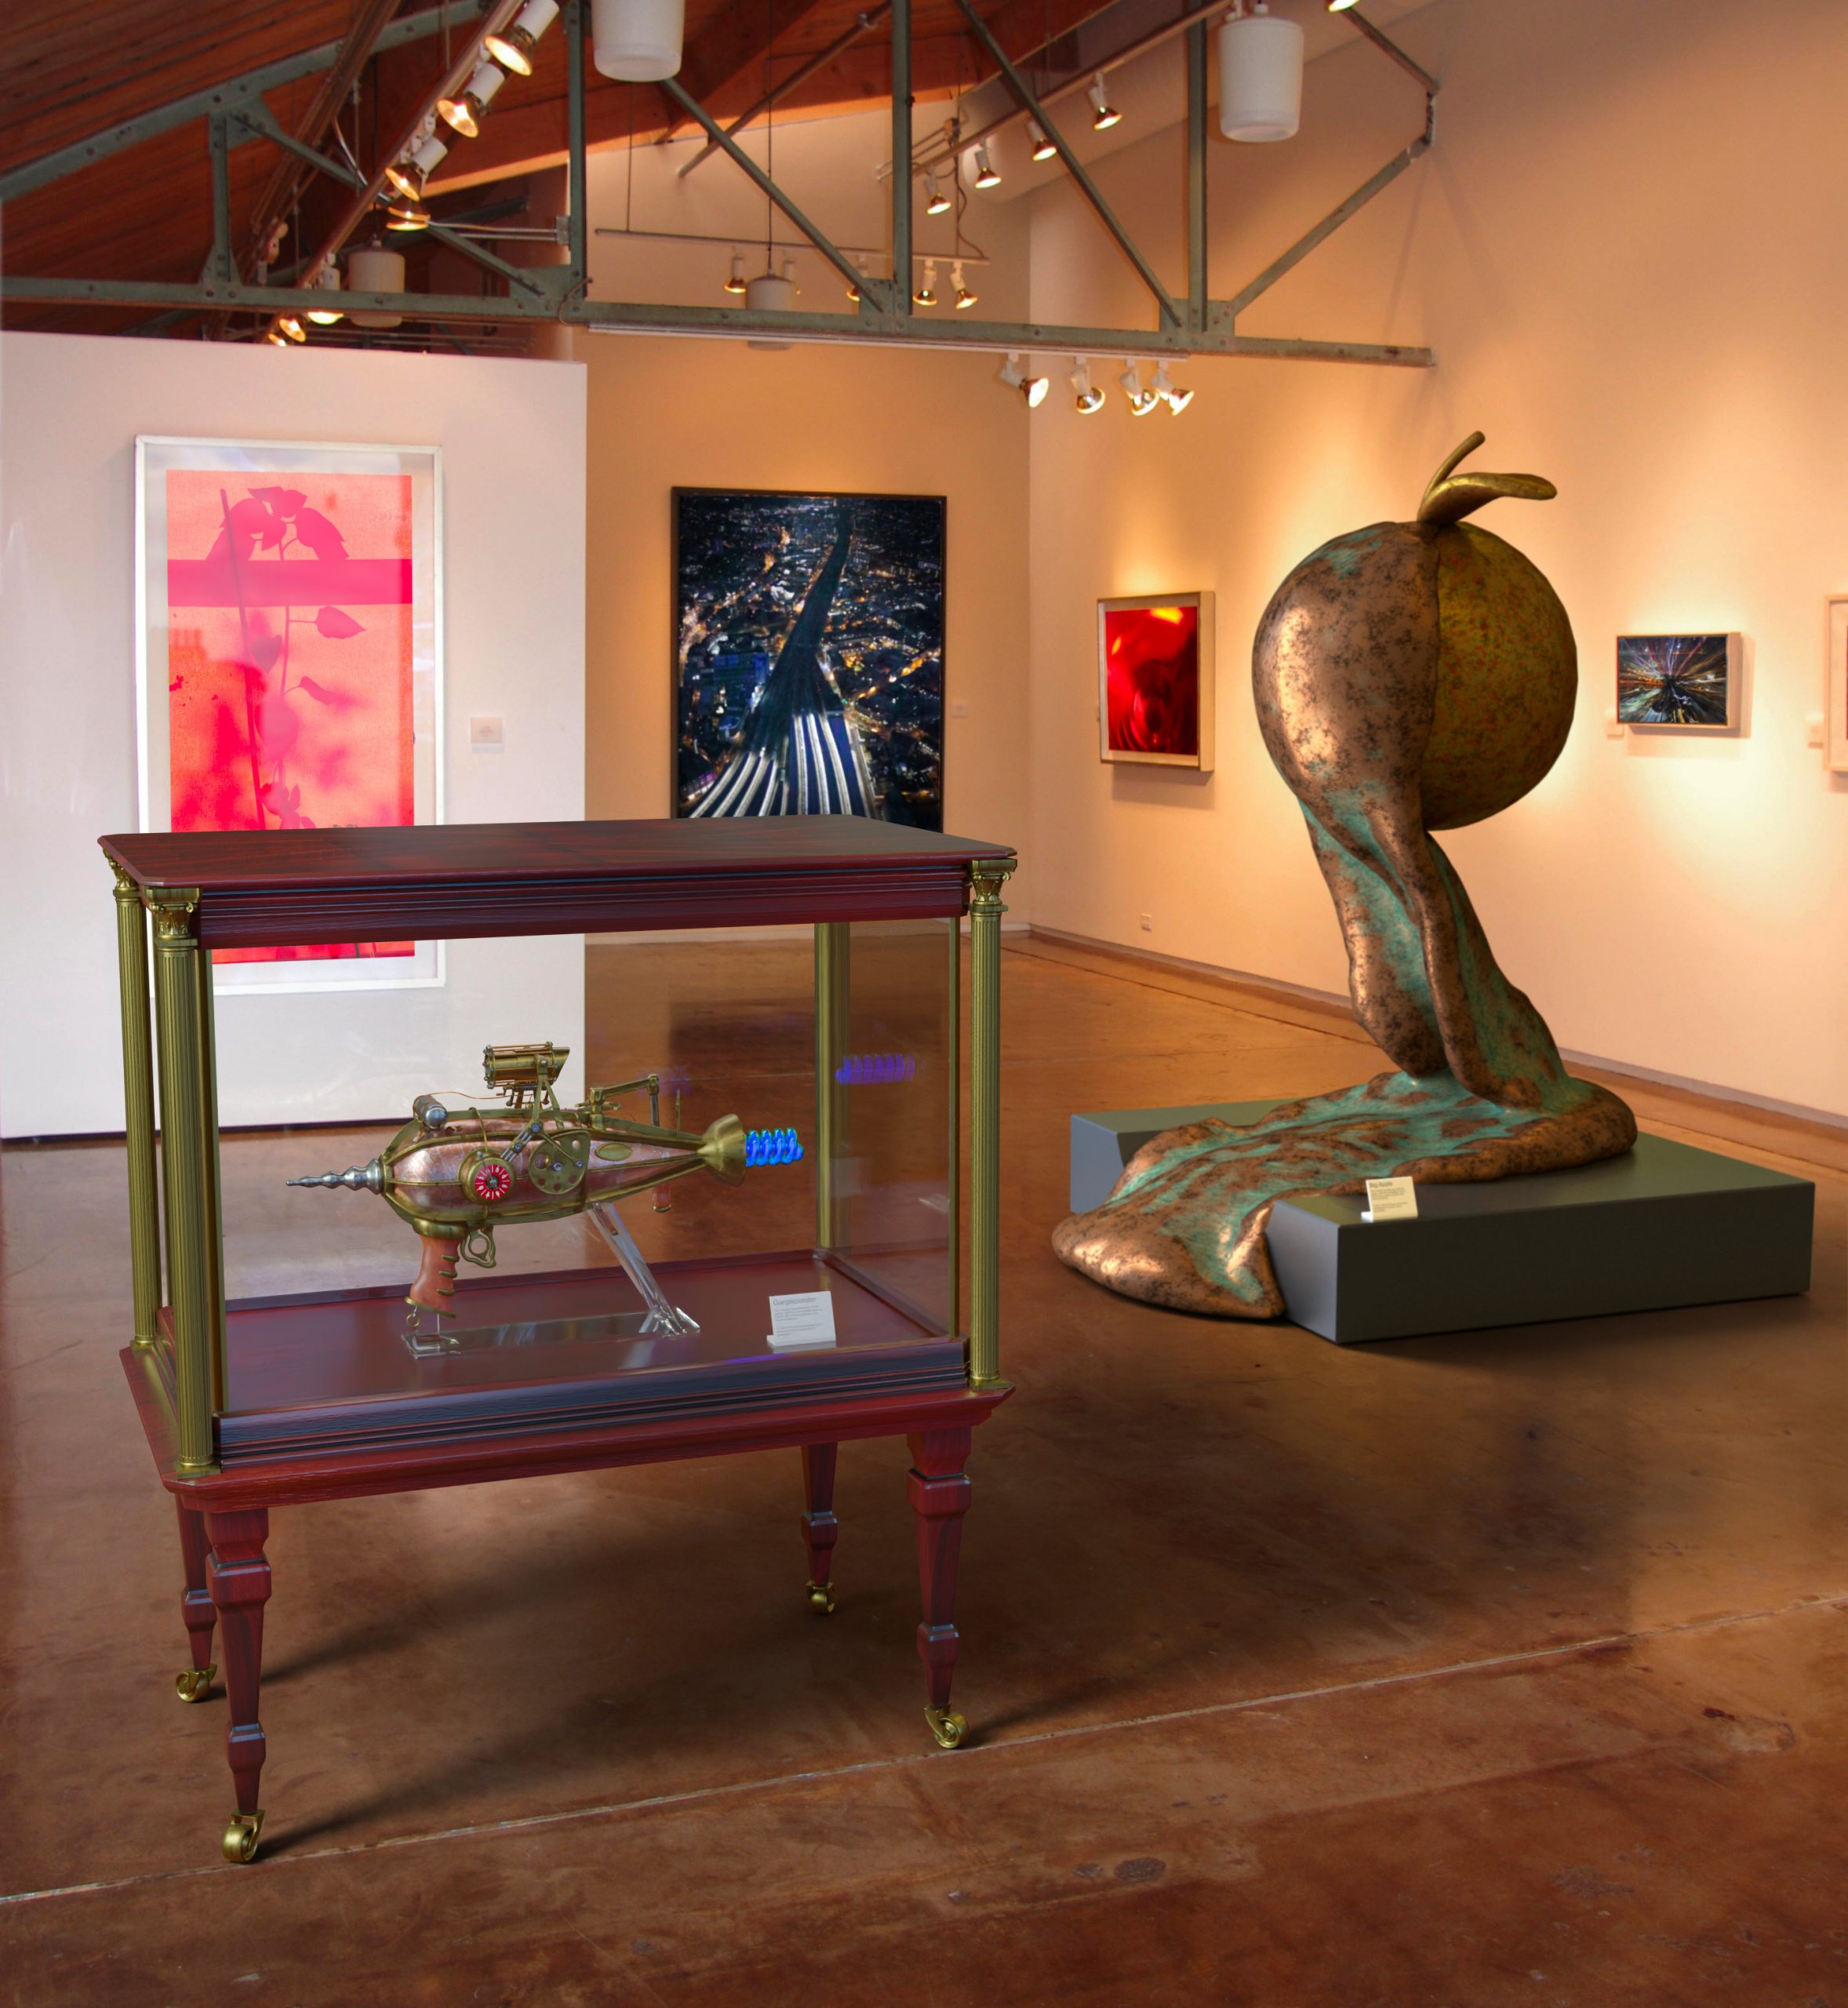
I would love to have a gallery to display my artwork, but in times like this it simply isn’t going to happen. So, this is second best – I replaced all the art in this photo of an actual gallery with mine.
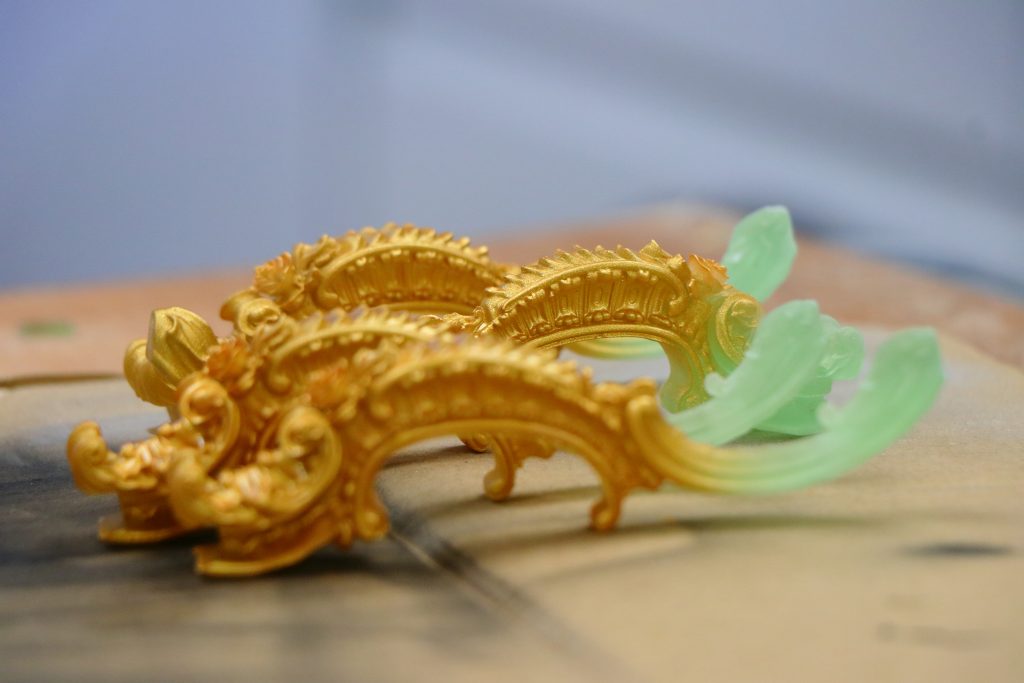
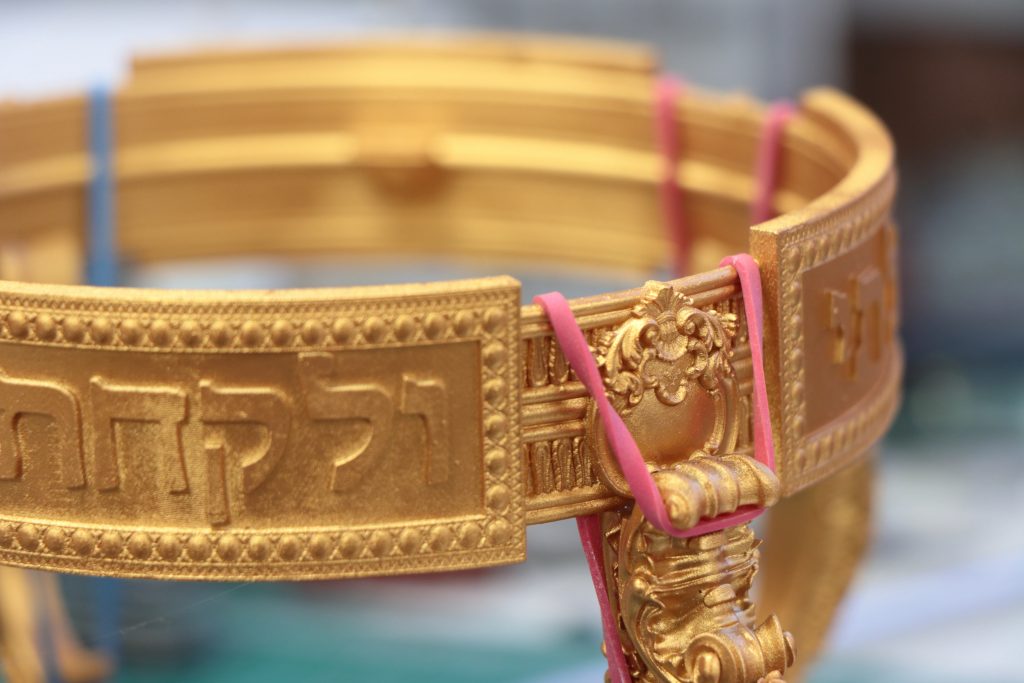
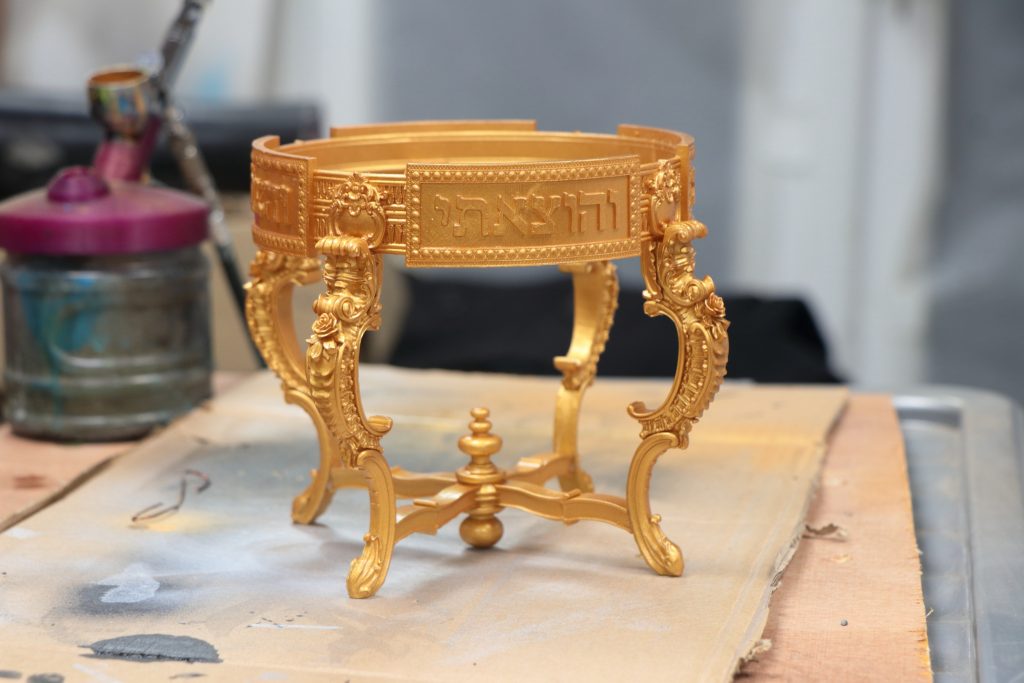
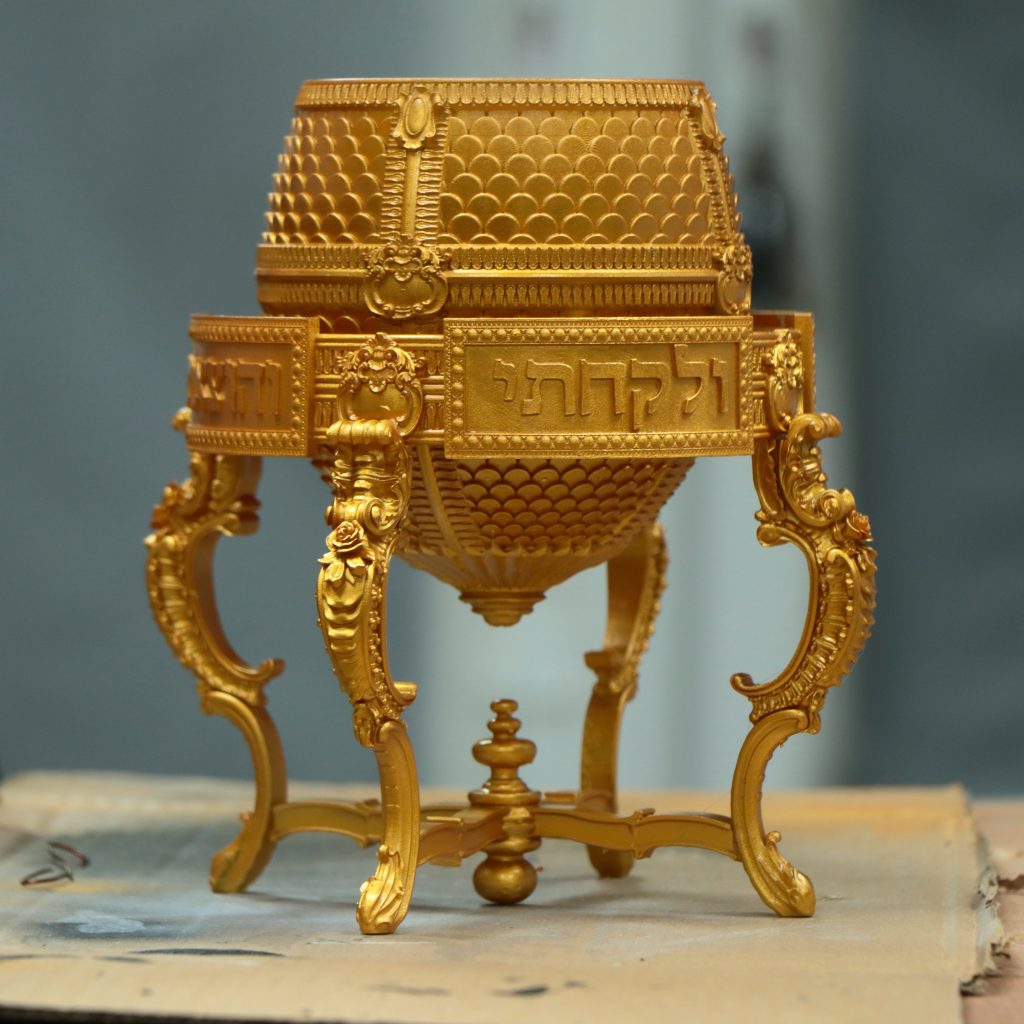
There’s nothing like something you made yourself to grace the seder table, and apart from designing my own seder table cloth, over the past few years I’ve been designing and making various 3D printed stands for the 5th kos.
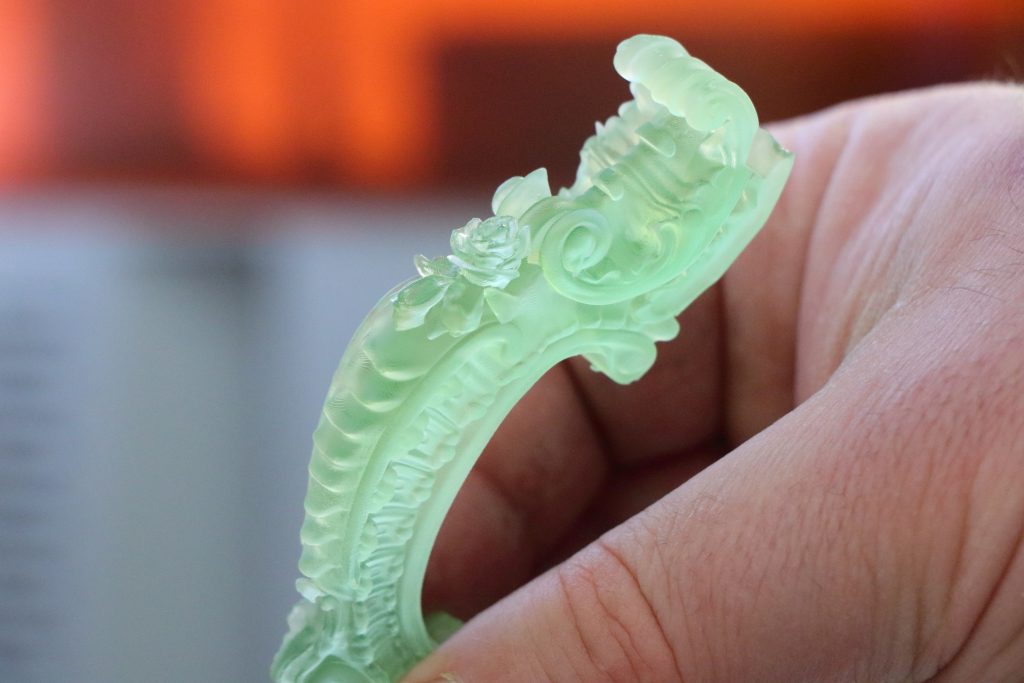
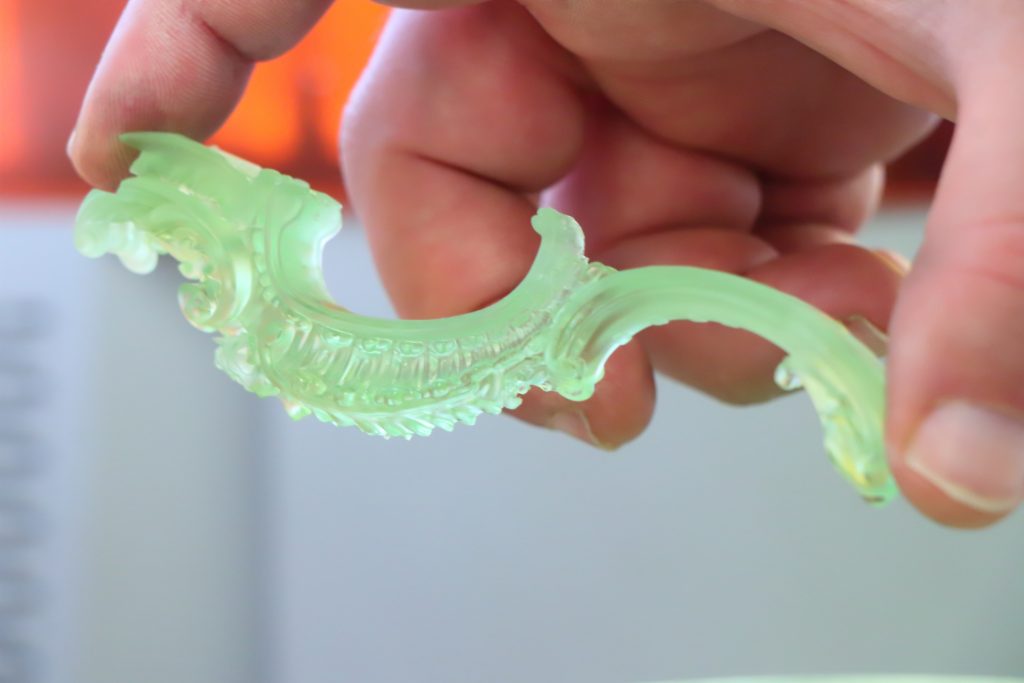
This year’s offering had a few false starts and finally ended with lashings of Rococo.
Glorious detail in translucent resin, close up of one leg.A view of a complete legA herd of small jade dragons moulting into gold.Some rubber bands holding everything in place while the epoxy curesThe base is finally completeThe completed cup in all its glory
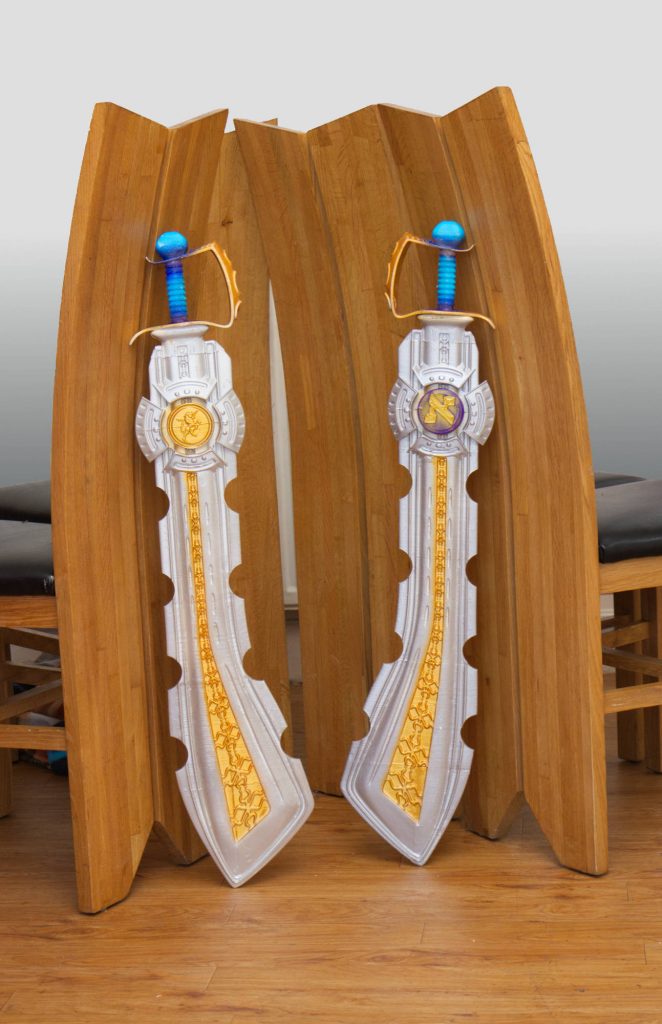
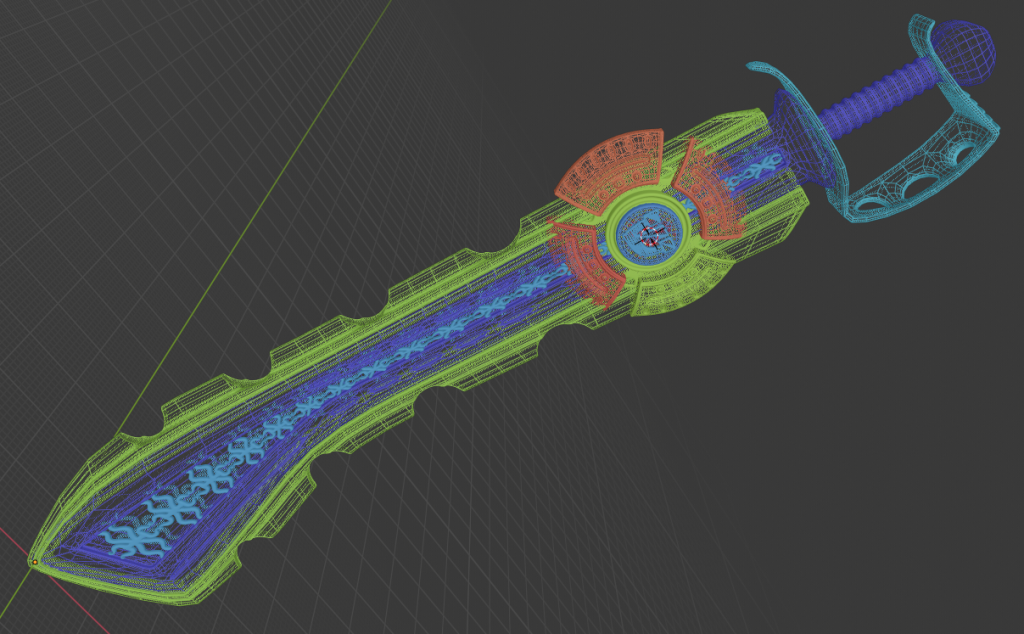
Amongst the variegated duties that befall me, making gifts for the ankle biters whom I adore and love so dearly is one that is particularly relevant when Pesach rolls around and Afikoman ideas are few and far between. This year I decided to make the youngest of my clan, both of them being decidedly male, a personalised sword each. Since they are at the stage where swords of any description are just fine, thank you very much, I did not spend too much time on the finishing.
The swords were printed in 12 parts each and assembled using aluminium dowels and epoxy glue. After some minor sanding (the boys are not all that fussy so here quantity is king, not quality) I applied a few base coats of white acrylic, then oversprayed metallic silver acrylic. The gold metallic highlights were airbrushed in afterwards, as were the handle colours. The last thing applied was a few coats of varnish.
Their reaction? Their collective jaws dropped, then they immediately started fighting with them. Fortunately after warning them that the paint is easily damaged they ceased all violence forthwith.
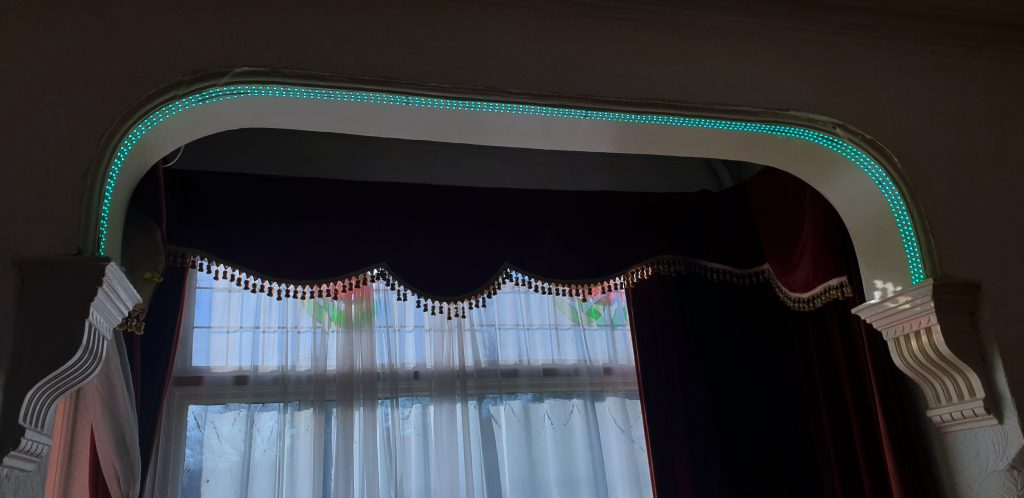
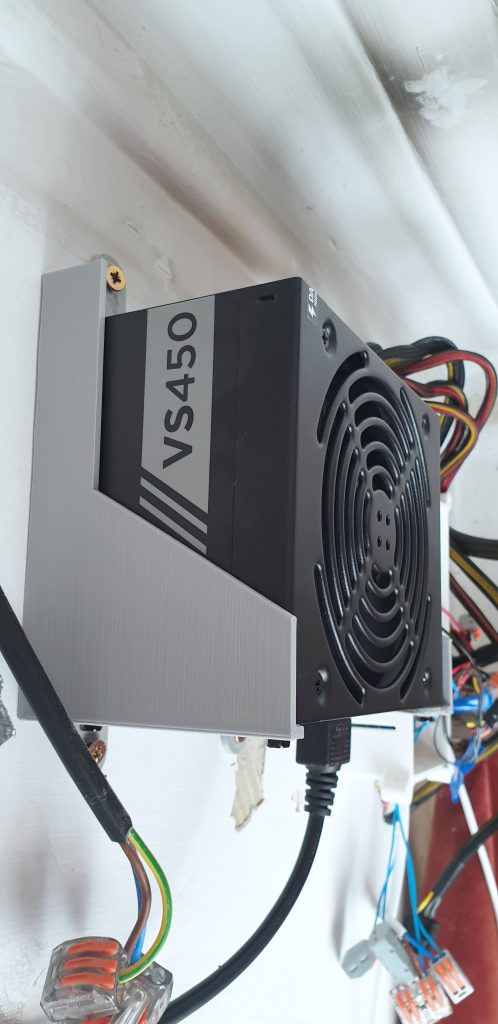
What with COVID-19 basically shuttering my business for the moment, my excuses for Not Getting On With Stuff were wearing a little thing. So, I schlepped out the ATX PSU I had secured a while back during a wild spree of sale-ing and employed my super-secret-sauce to rig it up to the LED strips that adorn my dining-room arch – AWS. Which stands for Advanced Wiring System.
This wiring system/method has taken me decades to develop, and I’m sure the results speak for themselves. Yup, that’s prime-quality no-name-brand gaffer tape there, me hearties.
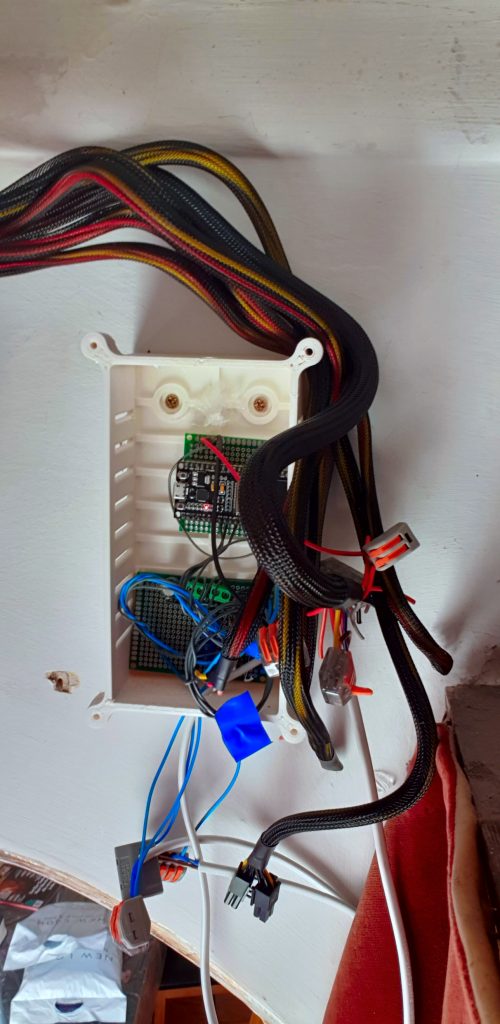
Also, a couple of small PCBs I rustled up in the light of a full blood moon, some of which contains the firmware I wrote (in an ESP32 – absolutely love that chip) in order to make the nefarious devices cycle the colours of the LEDs and interface with my WiFi so I can fiddle with this from the comfort of anywhere except for the dining room, should I desire to do so.
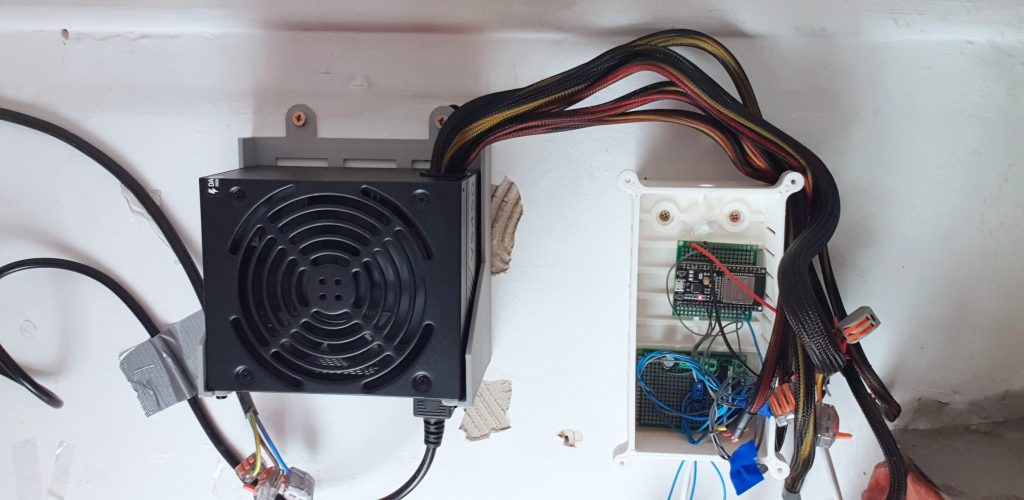
Since I did not have a mounting cage for the ATX PSU, I designed and 3D printed one, likewise for the case holding the PCBs which is also 3D printed.
Custom ATX PSU bracket for wall mounting.3D printed project box I designed for this sort of thing. The ensemble with your actual Gaffer tape.
NOTE: This has not been medically tested yet (if you can help with that, please contact me). Use this at your own risk.
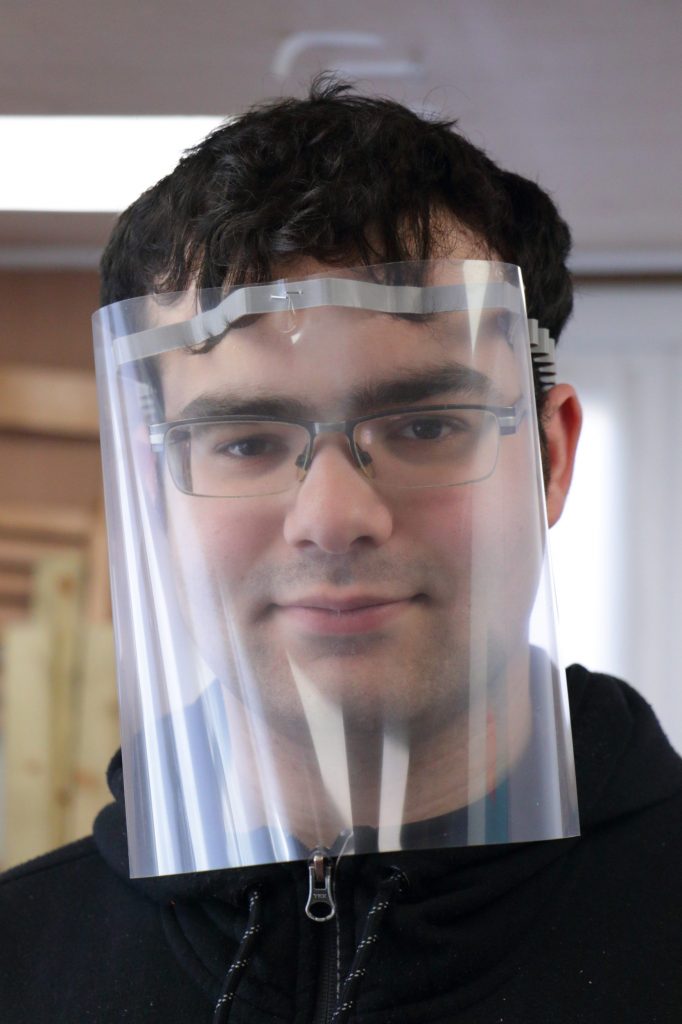
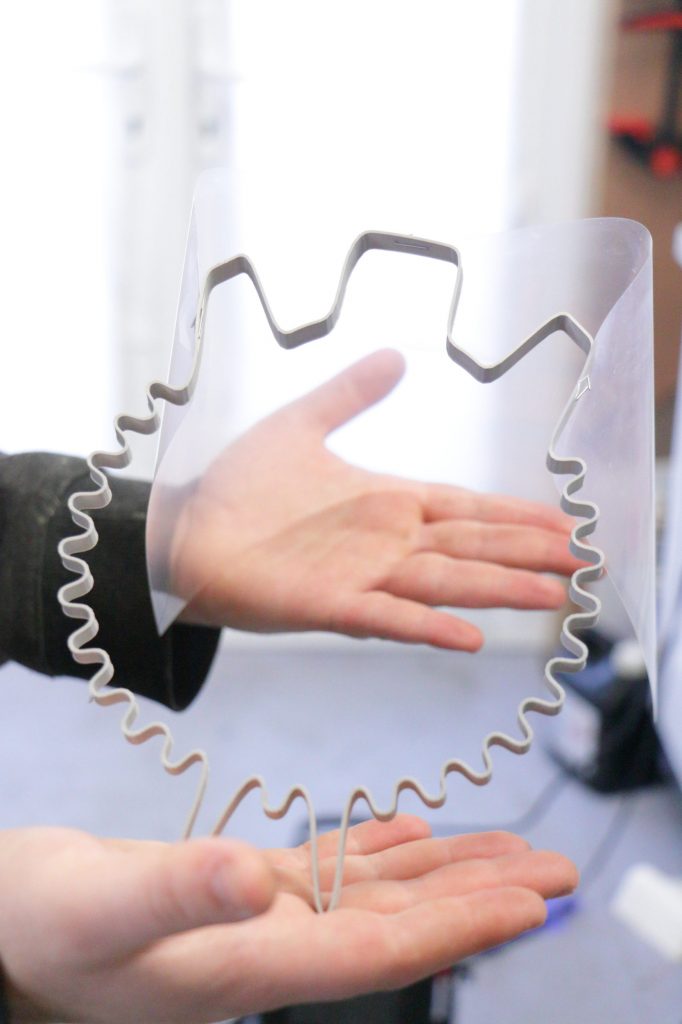
What with Coronavirus/COVID-19 running wild, all sorts of PPE are running in short supply, so we need some innovation to come up with alternatives. This face shield design requires a 3D printer as well as A4 acetate sheet or the equivalent which can be found very cheaply on Ebay or Amazon. The total cost for the face shield should be no more than 30p.
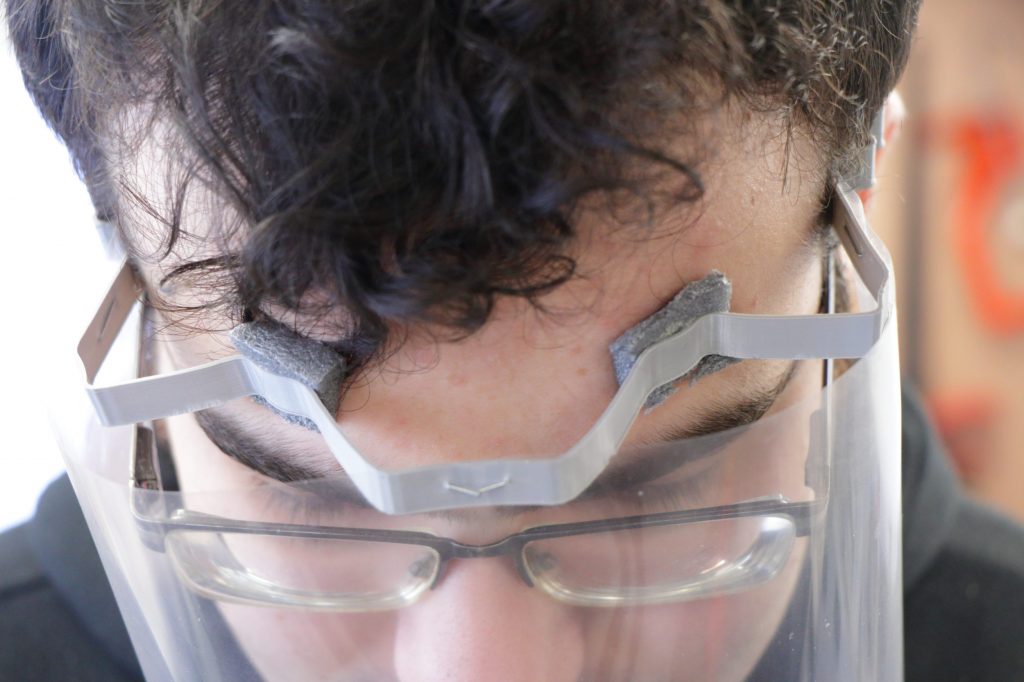
Benefits of this shield: it prevents particles being deposited on the mucous membranes of the eyes, nose and lips which are primary invasive sites for particle deposition. Basically, if someone coughs on you, this is the first line of defence.
Who needs this? Health care workers in high risk situations such as dentists, any hospital worker (even the cleaners, believe it or not), vulnerable people (elderly, underlying conditions etc.).
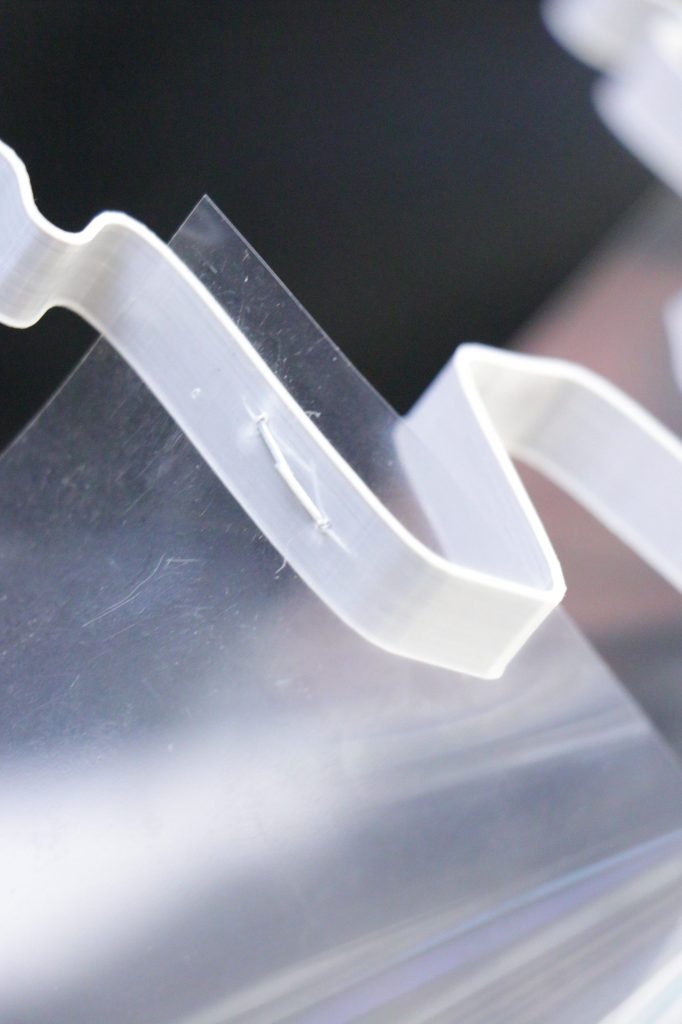
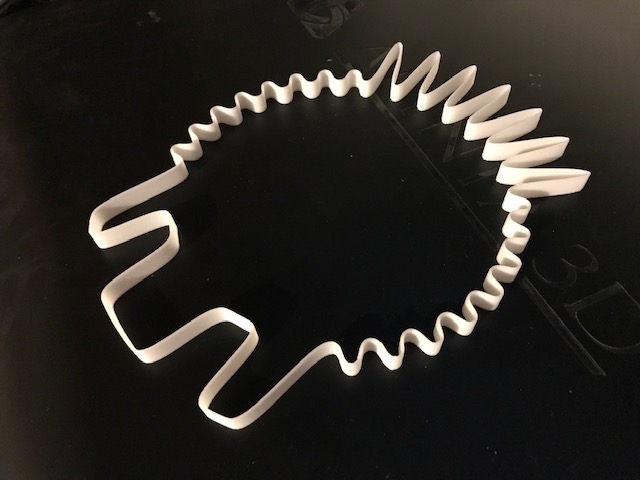
The shield can be printed in 11 minutes on an Ultimaker 2. Assembly should take approximately a minute. It’s one size fits all. It can be adjusted for smaller heads by stapling together the long loops at the back.
All it requires (apart from the print itself) are three staples, a sheet of OHP or some other A4-sized or letter-sized clear plastic, and optionally two foam sticky pads for comfort.
You will need a 3D printer with a bed size of at least 160 x 210 mm and a 0.8mm nozzle.
You can make these for considerably less by hunting around for good deals on acetate and sticky foam pads.
Download the 3D file here – this one is for spiralizing with a 0.8mm nozzle:
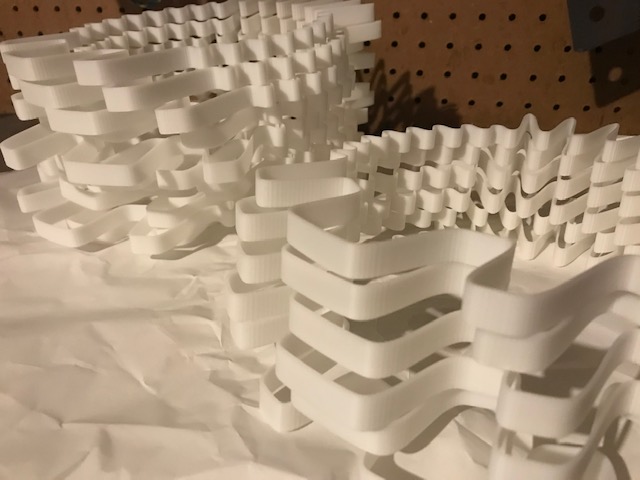
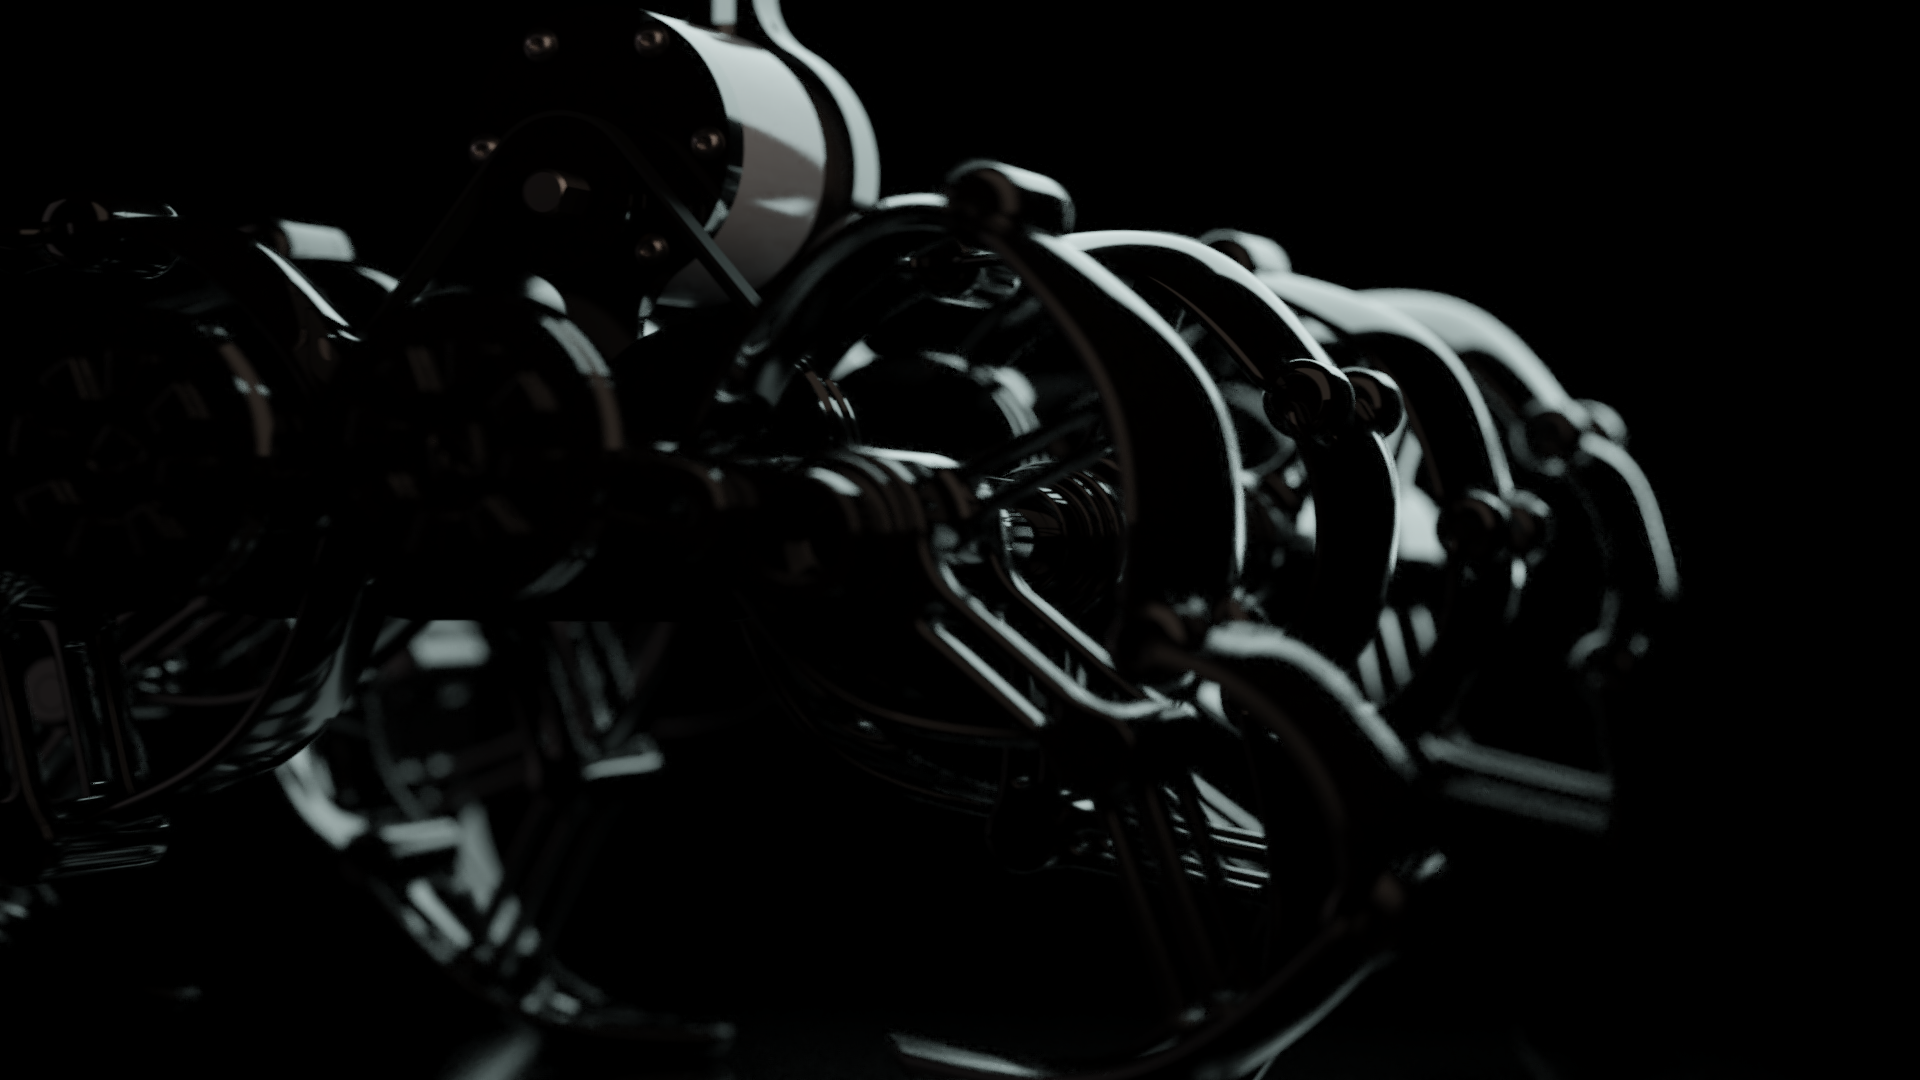
What makes this scene is the volumetric lighting. There is nothing much to it, a basic scene and a simple node setup.
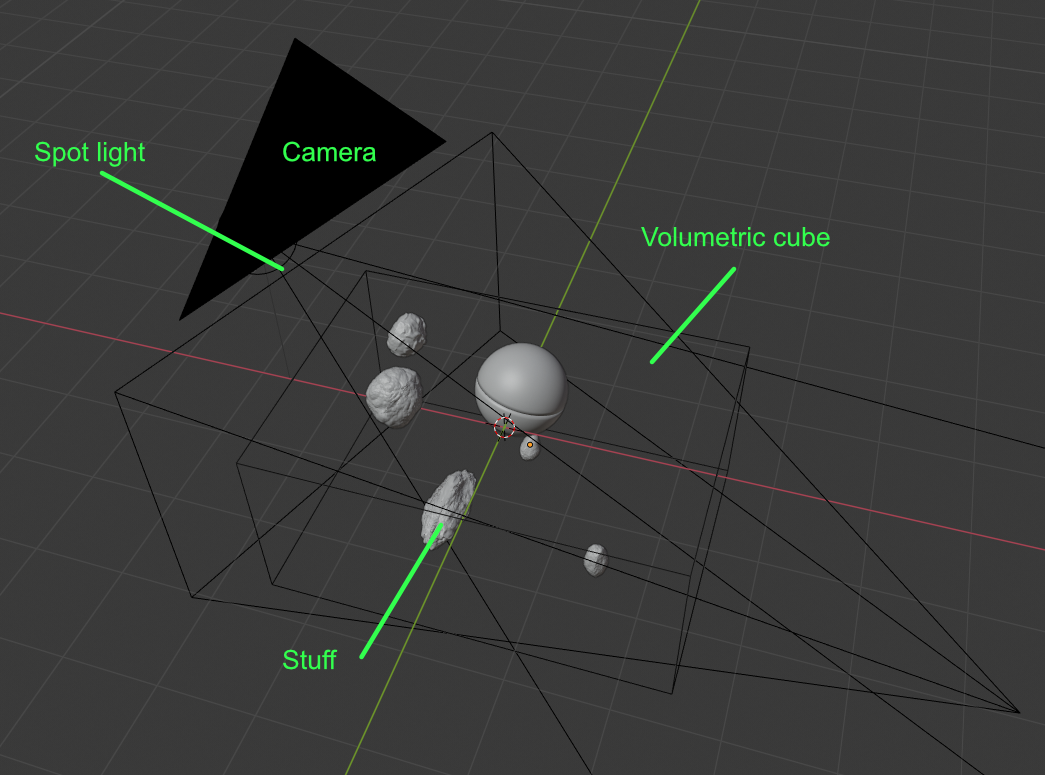
This is the scene:
Keep the face facing the camera relatively far away from the camera sensor plane otherwise things get hyper misty, but if that’s what you are after then move that plane nearer and have some fun with it. Also ensure that the camera frustum fully intersects the cube, otherwise bits of your scene will look weird since they will lack volumetrics.
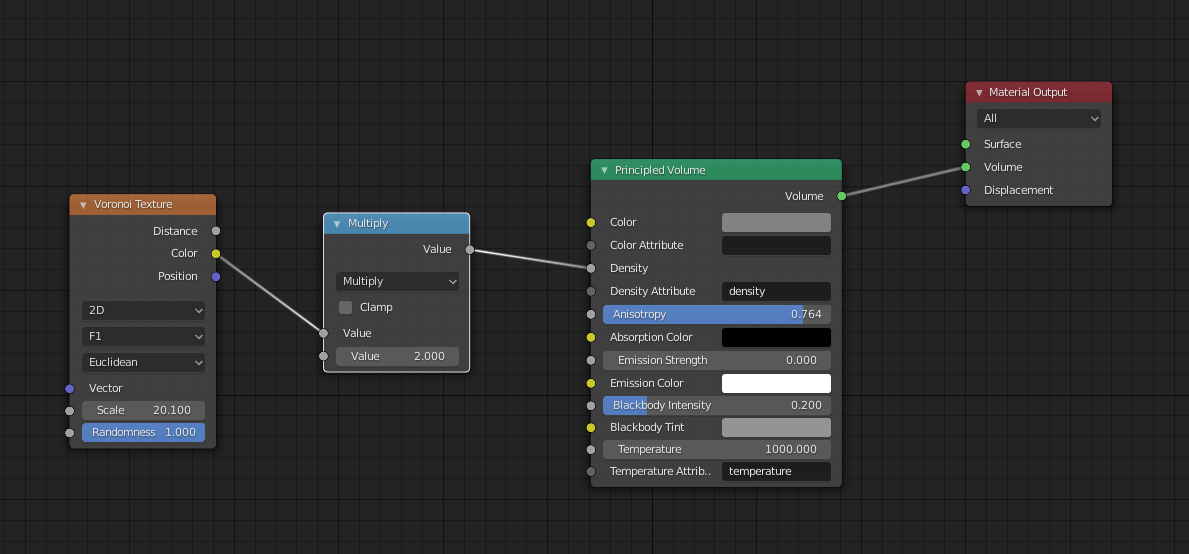
The key to this is the cube for volumetrics; here is the material:
It’s important to set the Voronoi node to 2D, F1 and Euclidean. That’s how the streaks are generated in the volume. The Anistropy does little, but fiddling with the Blackbody value can add some interesting lighting so it’s worth experimenting with, but can be set to zero otherwise.
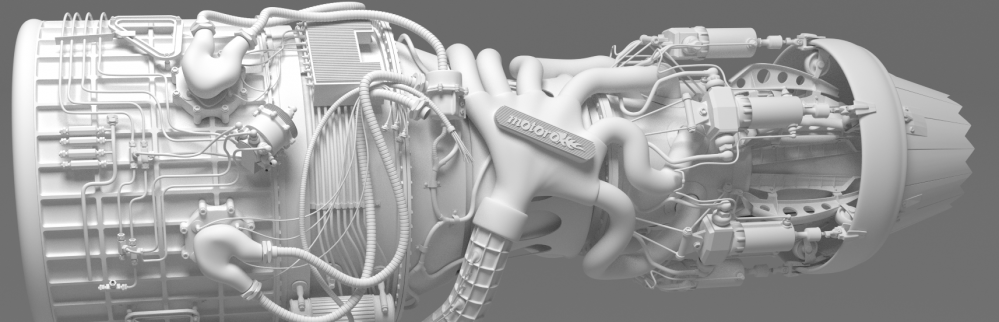
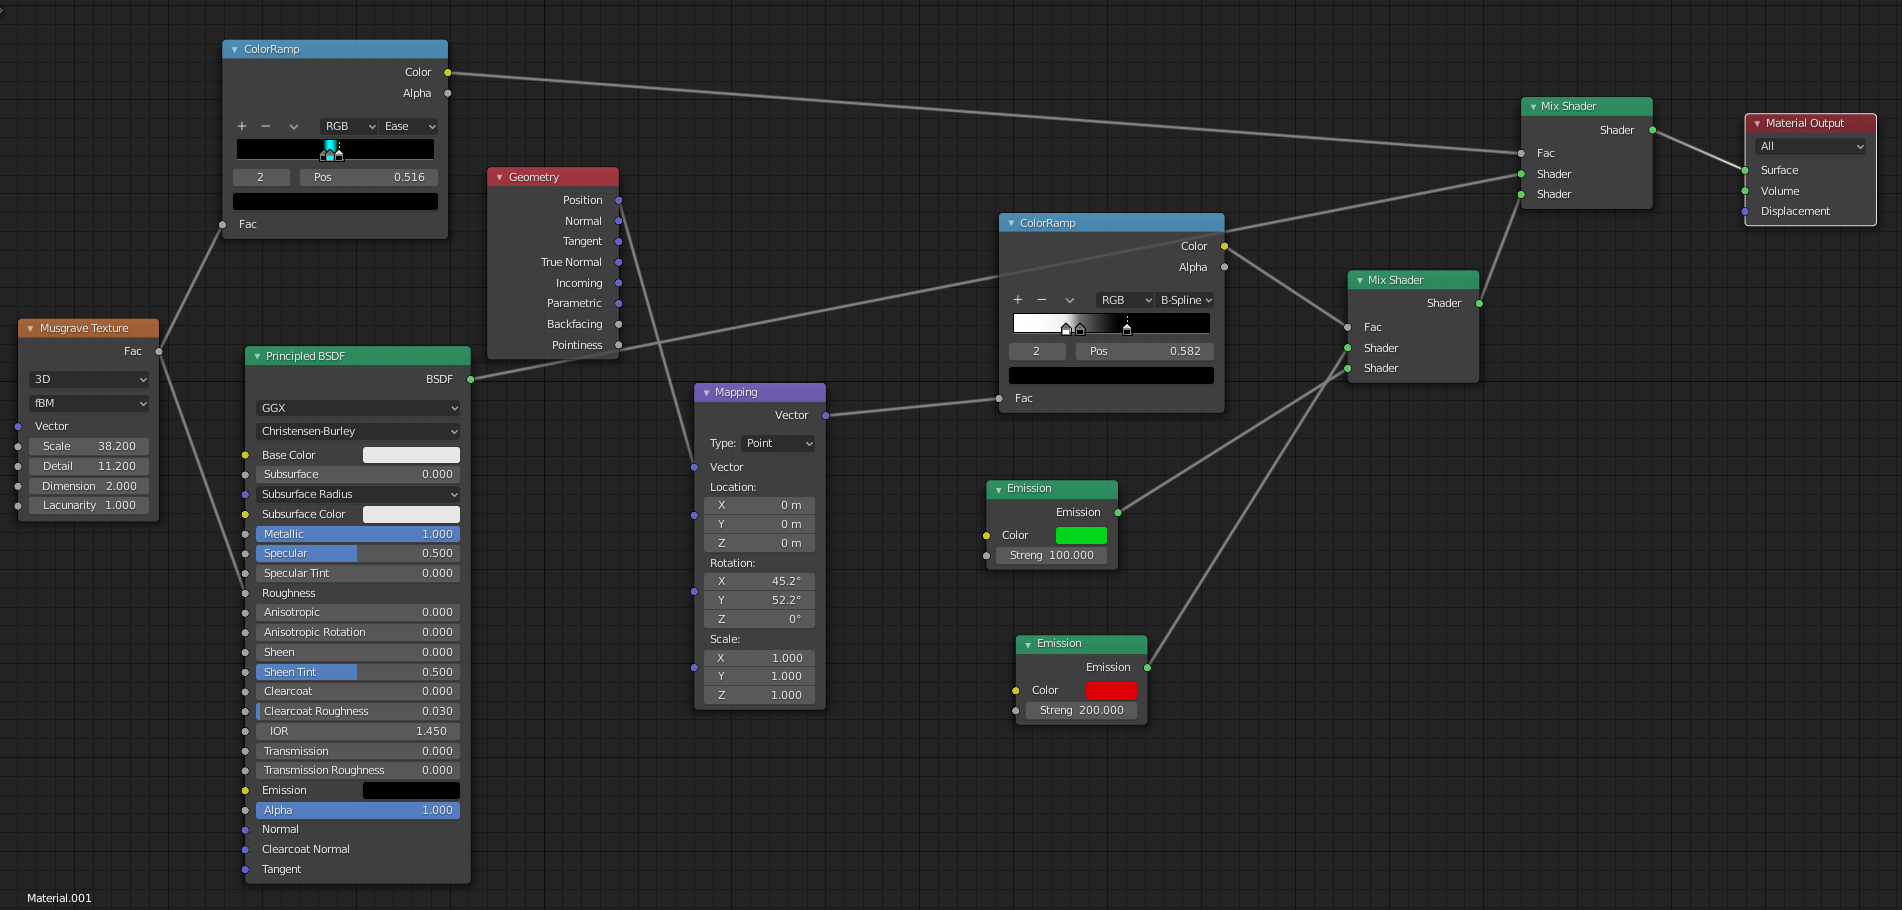
Just in case you were wondering how the alien sphere texture was set up, again it’s really simple.
The Musgrave node is used both for roughness masking as well as masking the areas to be lit by the glowing stuff.
Tweaking the colour ramp on the left (no idea why the centre stop is blue, it should be white) will control the width of the looping bands. I kept them fairly thin.
The geometry node was used as a shortcut to get the right hand side of the alien artefact red whilst the left is green with some smoothing in between. The mapping is used to rotate this effect into the desired position.
The big issue with volumetrics is noise. There is no easy way to solve that. The new denoiser node makes a hash of this sort of scene for some reason, so the simple if time consuming solution was to render the scene at a far higher resolution and downres it. Works a charm and in this case gave it a sort of oil paint like look.
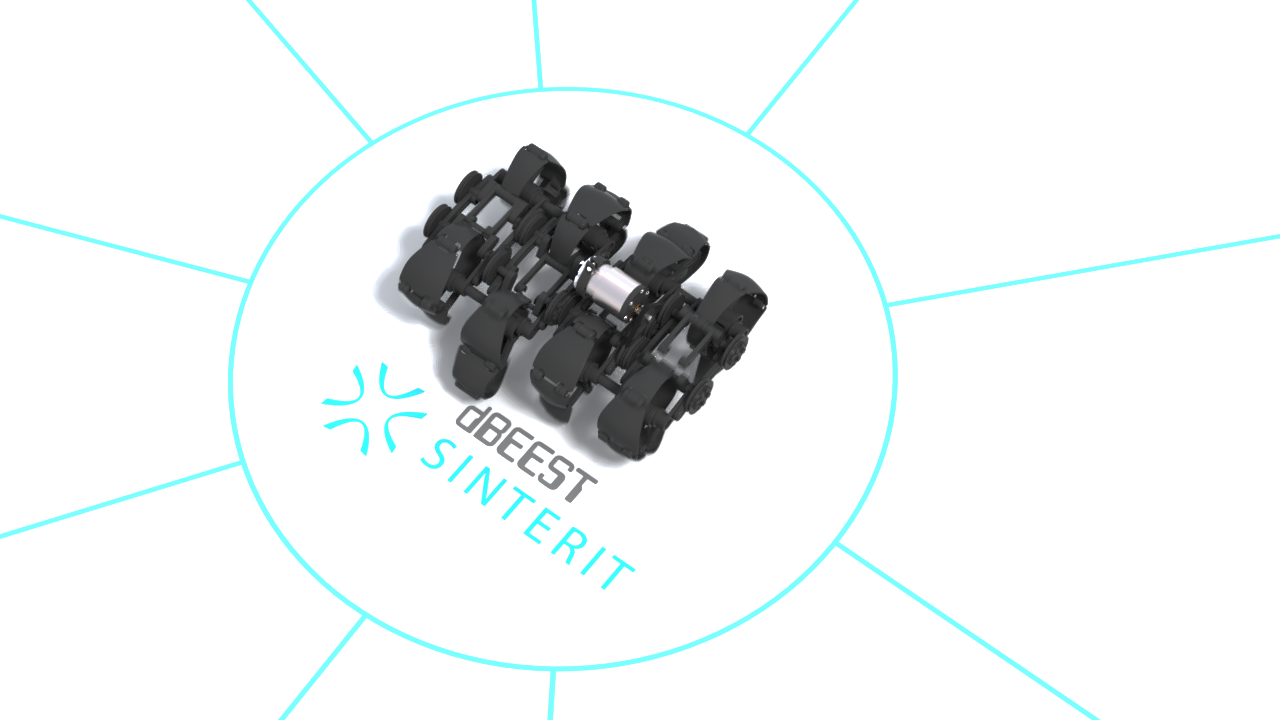
It was an exciting competition with a great prize, and I decided to give it a go. After some head scratching and other meditative processes I decided to design a more futuristic strandbeest that could be easily printed and assembled using SLS technology which lies at the heart of the prize’s offerings.
Below is the video I produced for your delectation. And no, I did not win. Oh well. Moving on, nothing to see here.
And in the interests of recycling, here is the description I wrote for the entry page.
Designed specifically for the Sinterit printer, this strandbeest variant showcases the printer’s capabilities. It’s a slightly different take on the usual Jansen’s linkage, combining both an organic and mechanical design language.
Jansen’s linkage is what lies at the heart of strandbeests, and they really fascinate me. Deceptively simple, these complex linkages produce a basic walking cycle, requiring only one rotating input. Using a series of cranks, complete units can be easily assembled and attached, all powered by one source, in this case a fairly common electric motor.
I wanted an organic design that would contrast the mechanicals of the linkage, hence the curved surfaces of the outer bars, and the rigid-looking inner bars.
Above all, I wanted this to be an easy print and simple to assemble with minimal tools whilst showcasing the printer’s capabilities, so everything is a snap-fit or printed assembled, with the exception of the motor mount because I didn’t have much choice there. Since this model is designed specifically for SLS type printing it’s going to be a struggle to print the parts using FDM or SLA.
The main linkages – the legs – are printed as one part and fit into the build volume with plenty of clearance. All the joints have sufficient clearance to make this possible, so they require no assembly at all. The main bearing has drainage vents to make clearing the powder easier. All the other parts fit neatly into the build volume as well, and you can probably fit all the rest into one print session.
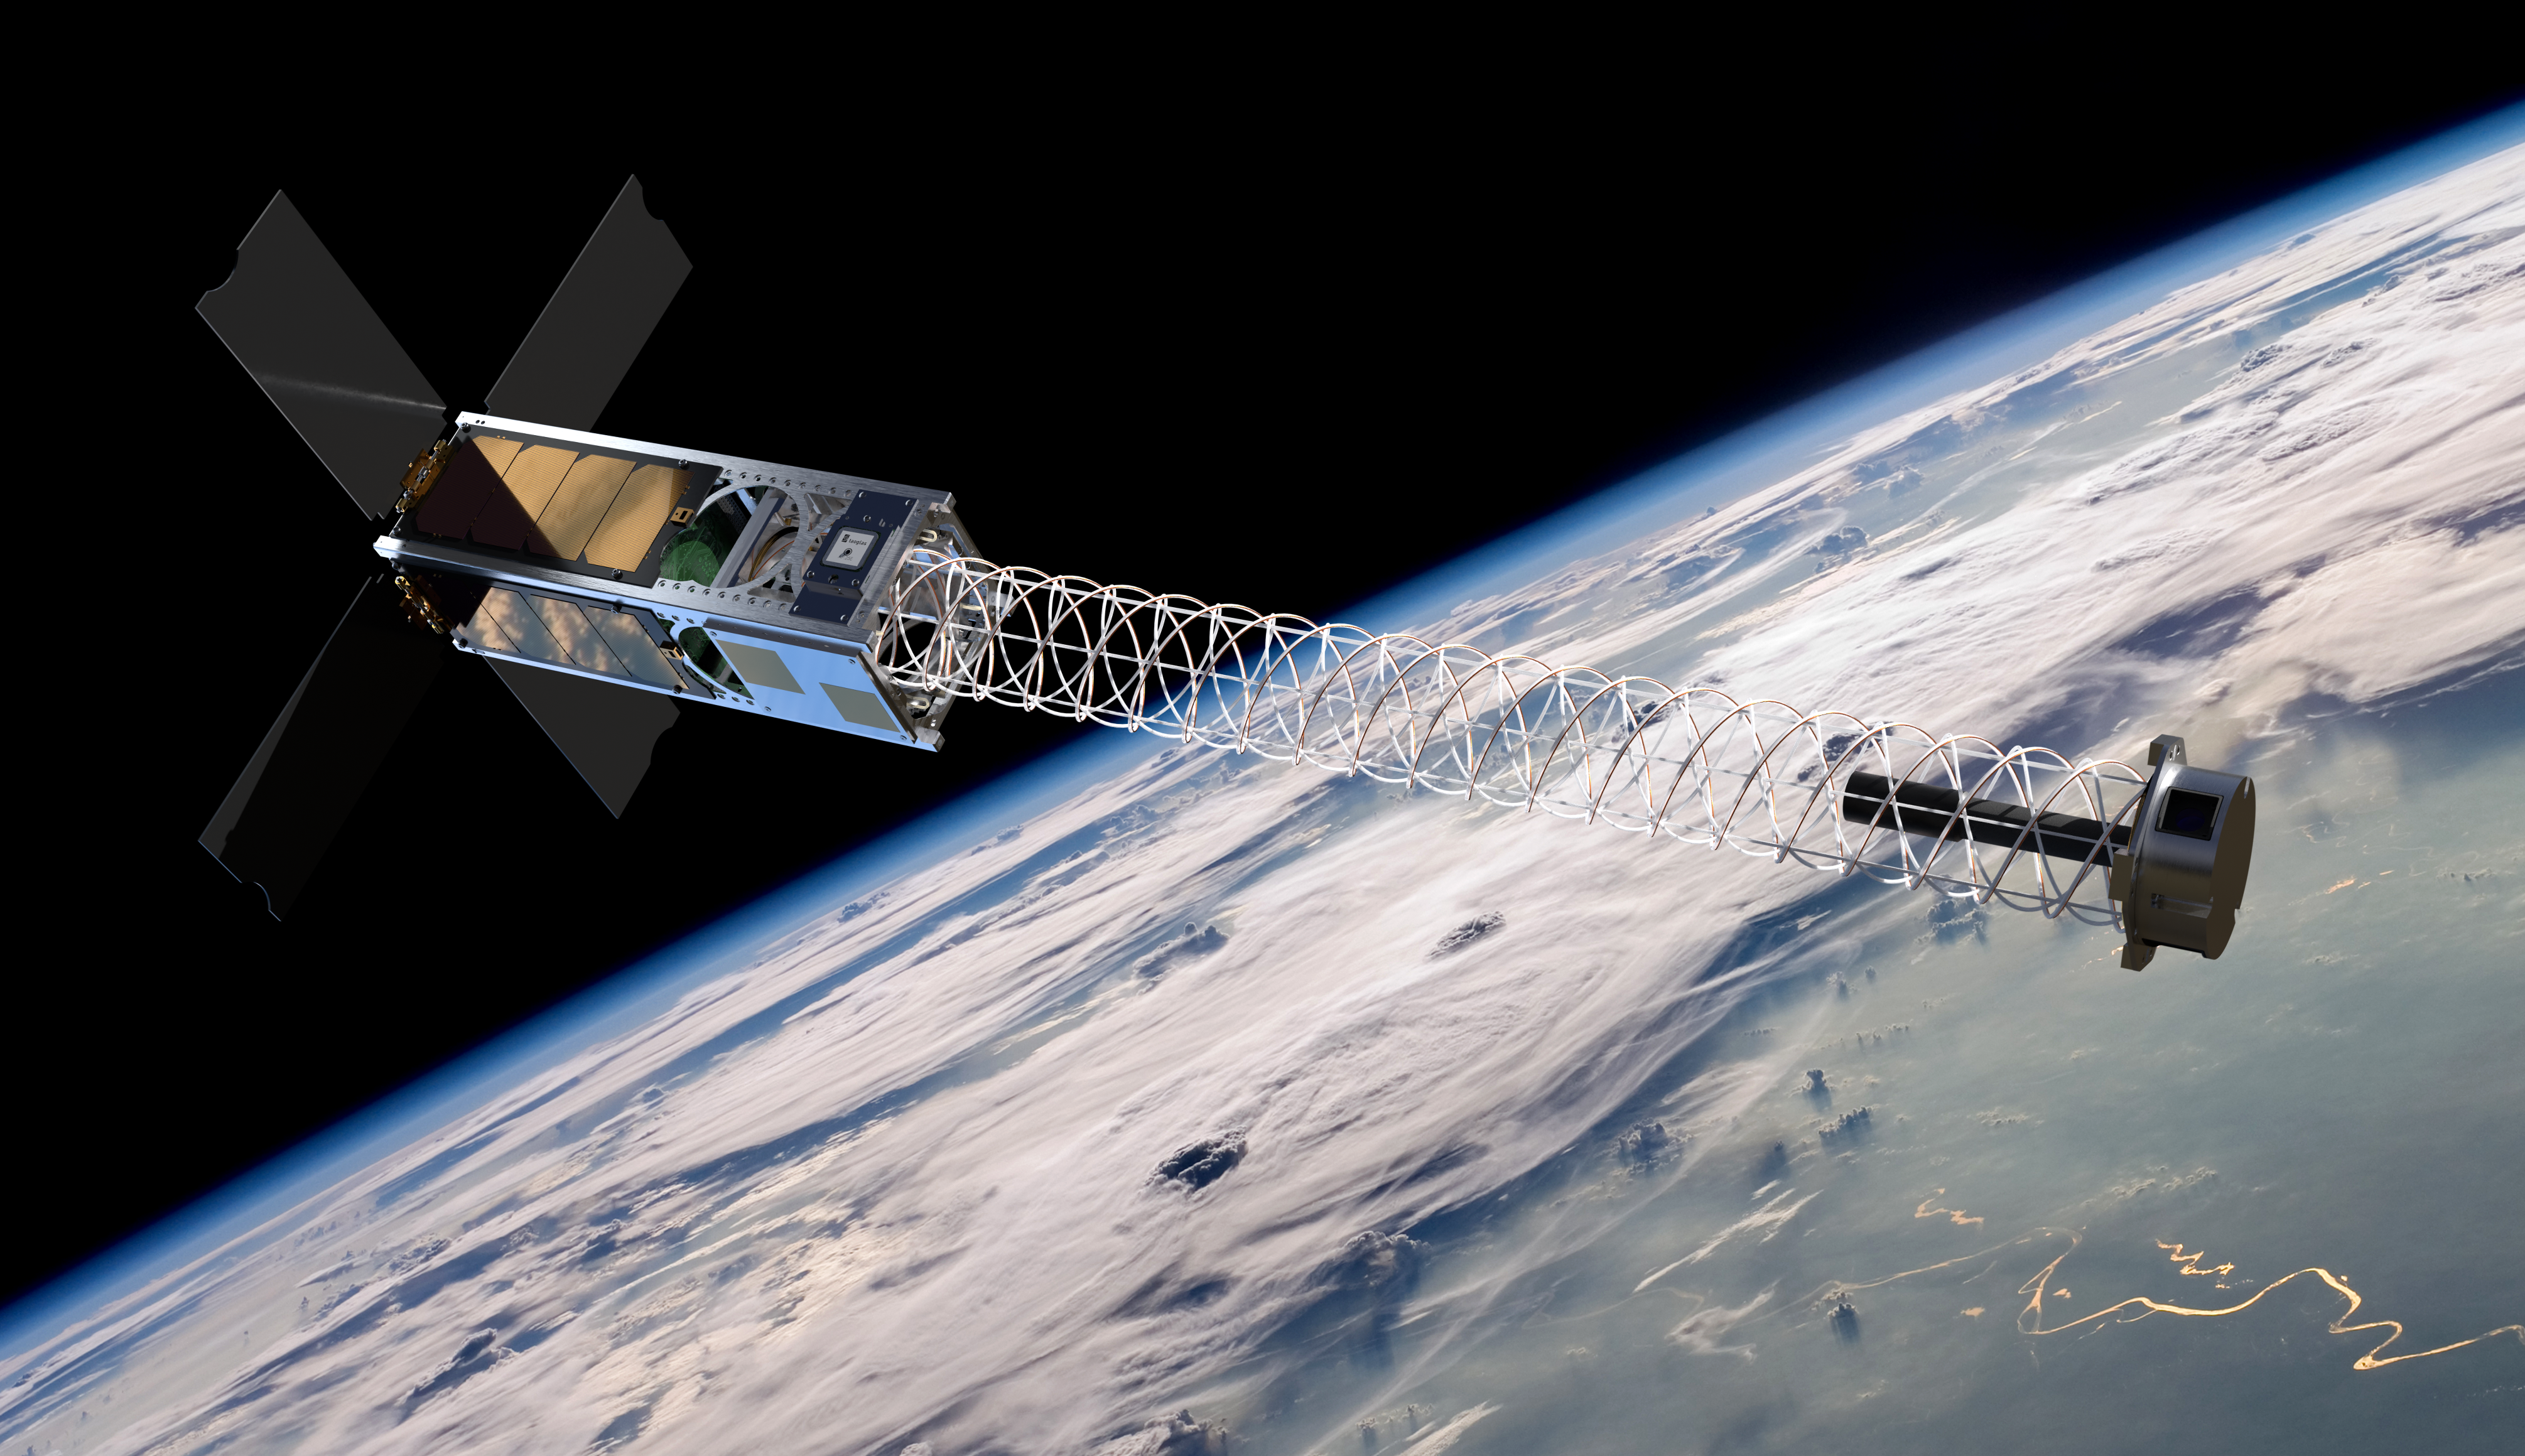
There appears to be a little space theme building up here. Coming rapidly on the back of the Space Poop Challenge is yet another space-based competition, the Cube Sat Challenge which Hugo Shelley roped me into once again.
I’m not sure which of the two are cooler, but it was yet another fast-paced job with lashings of Blender goodness.
Hugo delivered a CAD model with some pretty instructions. “Make it fly….in space….over a blue glowing planet…..animated unfolding….” yada yada yada. All very well and good, but it was quite a fiddly process figuring out exactly how the blasted thing was supposed to work.
The wonders of the interwebs meant that he was able to furnish me with a video of a paper model doing its thing, so in no time at all I was deep into a rigging sessions. Blender being what it is, there is no “proper” way of doing anything, it really boils down to whichever work flow you are comfortable with.
It’s a pretty neat concept, one of the key features being the antenna “legs” that unfold in flight in a really simple yet incredibly clever way. Think of it as engineering origami.
My initial reaction was “simples” until I realised there will have to be some synchronised shape-key skullduggery and then there was much gnashing and wailing of teeth as I attempted to wire up everything using drivers and one empty. In theory, this was a great idea. In practice, when literally every second counts, complexity is you enemy. Especially when Blender still has some rough edges when it comes to instancing and requires some rather humorous if pretty annoying work-arounds.
It does not help the the NLA editor is clearly smoking the dope sheet, and the dope sheet is fighting the action editor and everything is a giant, messy spaghetti when it comes to animation. This is Blender’s strength and achille’s heels. The software has tremendous flexibility once you have gone through its insane learning curve. There are so many wrinkles you have to learn, but they make perfect sense once you have all of that under your belt.
Fortunately there was not that much that had to be modelled this time, and the texturing was quite simple. Lighting was a bit of a pain, and some stuff had to be composited, and rendering a lot of frames takes absolutely ages so we resorted to render.st who are pretty good, both price-wise and support-wise.
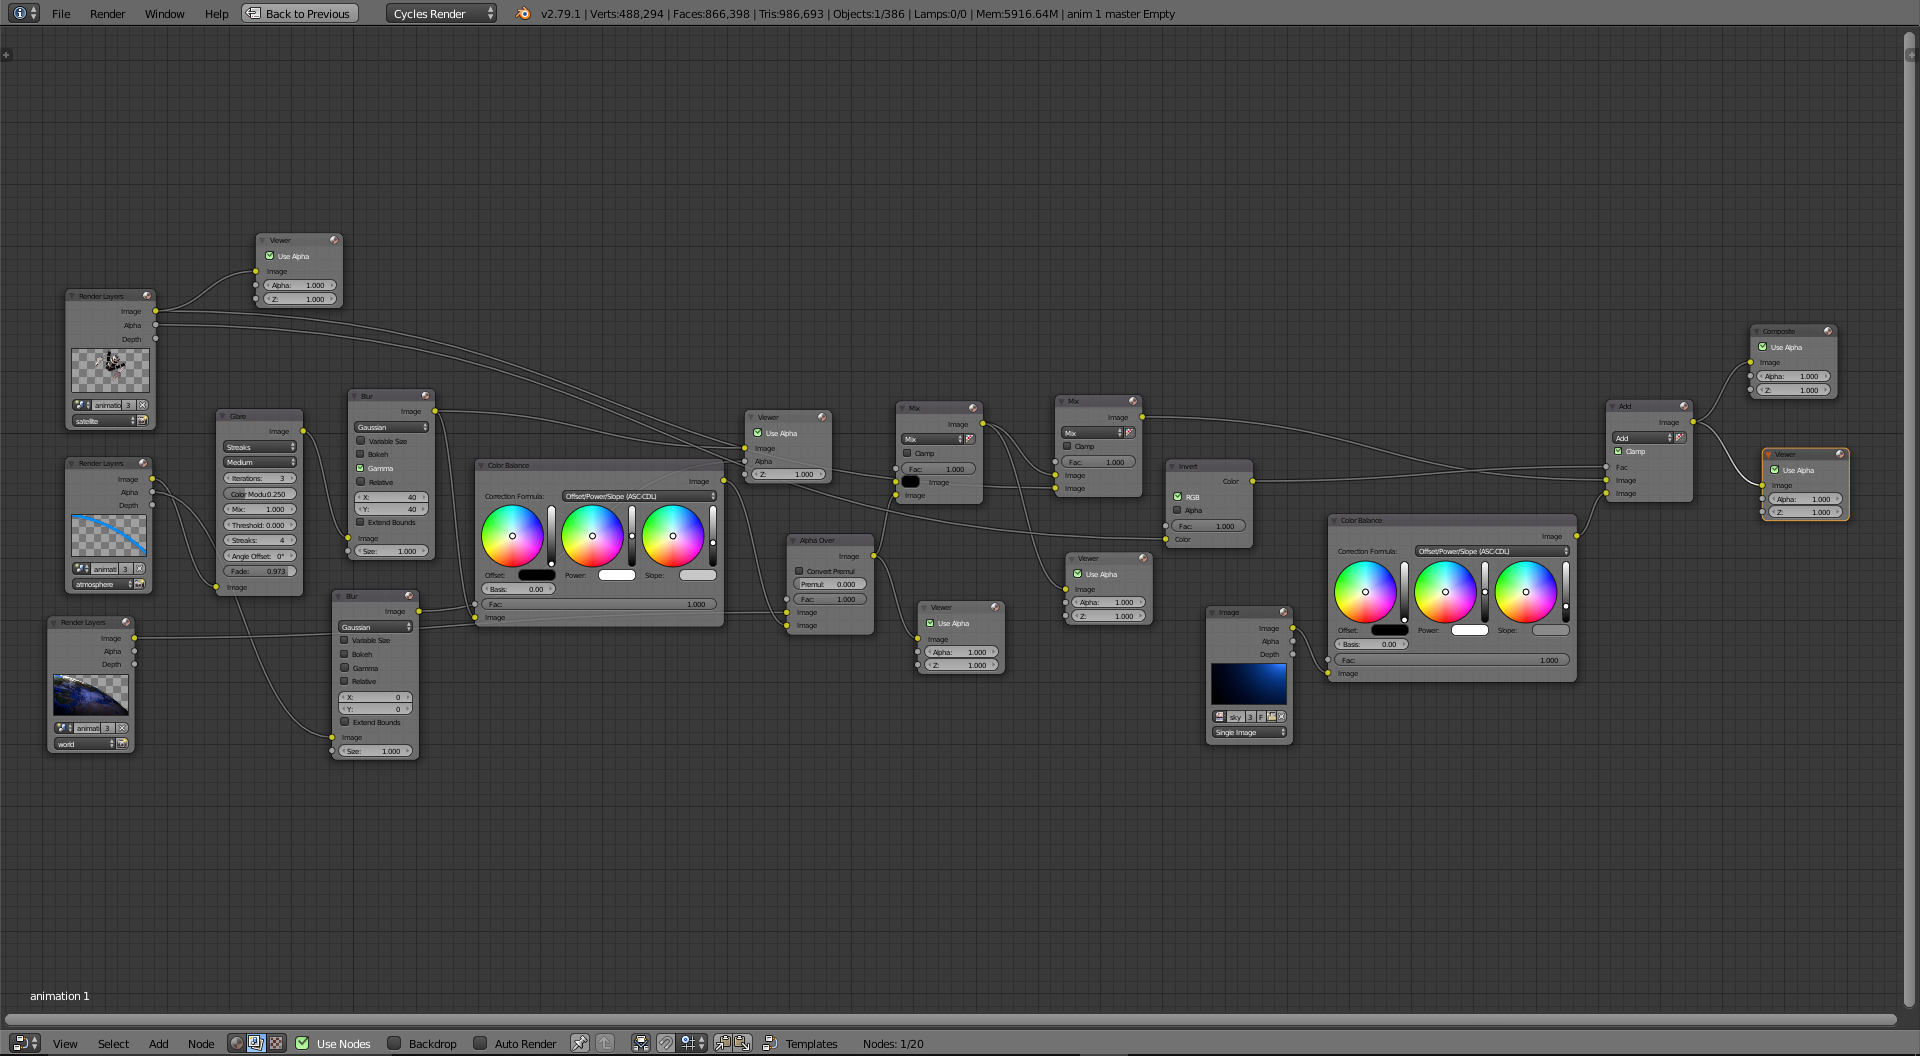
Compositing in Blender is really advanced, and there are no end of tricks that can be employed to get the result you want; in this case I went easy and really did the bare minimum in order to save time and reduce the sheer amount of grief a complex node-tree can cause.
The satellite was rendered on one layer, composited over the sky haze which was blurred with a gaussian node, and all of that was dumped over the earth. Some very simple sky glare was blended over the whole mix.
As with such projects, time was really of essence, so I couldn’t get all the special effects in that I or Hugo wanted, but the end result seems to do the design justice nonetheless.